Prop Maintenance On Bravo III
Prop Maintenance On Bravo III
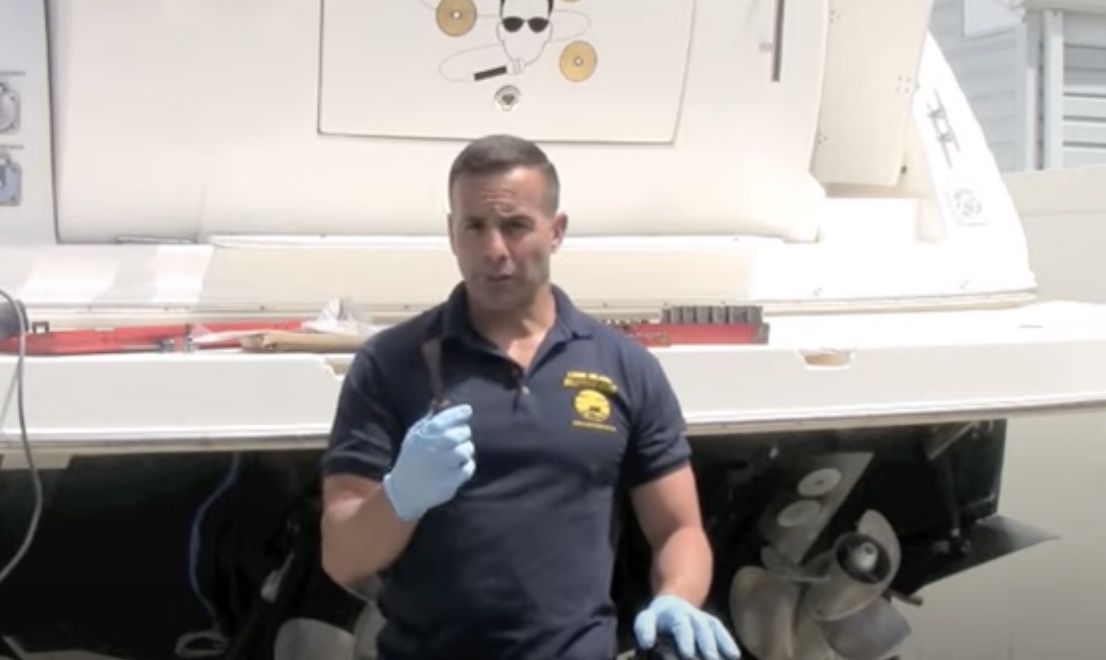
Today I’m going to go over how I take off my props on a Bravo 3 dual prop system, this is important to do. I do it every two seasons to make sure I lube the shaft and lube the prop as well.
There are a couple of tools that we need to get this job accomplished.
The first thing you’re going to do is take off the nose cone, that’s the anode
with a T6 allen key socket, that’s going to take that off.
Once you get that and take the nose cone off, you’re going to run into the first bolt that holds the first prop on, that’s an inch and 7/16, so you’re going to need that socket. Usually, it’s a half-inch drive is what you going to use to take that off.
You may need a break a bar but usually, but usually, the ratchet is good enough to get that one-off.
Once you get that off, it’s time to get the prop off, so if you have some problems we have a block of wood and we are going to hit it right in the back of the prop and that’s going to knock it off. I’m going to show you how that done once we take it apart.
So, the next thing I’m going to run into is the Big Bolt that’s going to hold back prop, so this is a special Merc tool. I got it on Amazon I’m going to tag the part number so you know what to get with it. Before you take that bolt off you want to make sure you clean the threads and make sure it’s really clean. So I have a wire brush and some Armor all. Make sure you get all debri off, any growth, any rust, cuz you are going to have a tough time getting that bolt off if you don’t do that. So it’s very important to do.
Now once you do that you’re going to continue to take the bolt off and once you get the bolt off it’s time to get the prop off, go back to the block of wood and the hammer. All right, now when it comes time to put it back together you’re going to grease up the whole shaft she needs some marine-grade grease.
So you’re going to use that and you’re going to use it on the race, and the shaft and the inside the prop on the gears.
Once you get the backdrop on, then it’s time to put it back together, you need a torque socket. There are some torque specs, the back one on mine is like 100lb and the front one is 60lb. Make sure you torque everything, we are going to go over that when I’m putting it together. I’ve pretty much explained all the tools, so let’s go and get this job accomplished so come on with me…
Okay guys, so now I’m going to get ready to start to take this prop off, the first thing I’m going to do as I said isn’t that T6 is take off the nose cone, this isn’t that complicated of a job, it just could be a little difficult if things get frozen off.
The next thing I’m going to need is it half-inch Drive inch and 7/16 socket. So now to get this off you may need to put the block of wood on here like this and then spin it to that, and then break it like that. Ok, that wasn’t too bad and I was going to try to get the prop off. So we took the first prop off. That easy!
Now another important thing that I didn’t mention, is when you’re trying to line them up, what happened with mine, and I notice when previously doing it,
the two, see over here, the Merc part number is lined up so when I put it back together I’m going to do the same thing.
So what you should do, is take a picture and mark where it is on here, so you can scribe it, so you have it and you know you’re putting it in the same way.
Once you get to this point you’re going to see there is some little Barnacle sea life on here she wants to clean this up good, and that’s why are you wire brush comes in, you may even need a scraper, but make sure you clean up the threads good on this and, if you don’t do this you’re going to have a tough time getting it past the threats that’s the last thing you want. It doesn’t take that long to do.
Okay now looks pretty good, a special Merck prop tool. Then you get the block up in here, and that’s the other bolt. Now I try to get the prop off just by pulling it, there you go. That’s because I usually do this every two seasons.
That’s the second prop, so now its looking pretty good over here.
There are two grommets, one back here, so the copper grommet, you see it right there, and it’s usually one up here. Since the other ones are not here, it’s going to be right over here. So to get that out, you just flip it over. We’ll get a screwdriver and a hammer and will pop it out and there is the other grommet.
Ok, make sure these things are all cleaned up and put it back together.
This one would go here, not that complicated and now what we’re going to lube this up, but before I do that, what I do is I clean these props well.
So I’m going to get inside of there, wash, clean it up, get everything off it,
and then put it back together.
So because I have two, I have this one and I’m going to put the props on that I cleaned already.
So I’m going to go get the other props.
I’m on my other side. I already started lubing most of this out, so I’m just taking this off.
The grommets right here, that I was talking about, that has to be put on,
I have lubed inside of there, so what I’m going to do, is go over how I lube it up, which is easy. I’ll put lube all around it, its a good idea to wear gloves.
This prop will go in like that, so I’ll keep it right on the edge like that like it was on the other one and then I’ll get ready to put the bolt in, the bolt-on.
When I get ready to tighten it, I use my block of wood in here again, tighten it hand tight. Now, this is going to be a hundred foot-pound. So as you can see, I got a hundred foot-pounds so I’m all ready to torque the first one. I just put this in here, and you heard the click, so that means it’s tight.
So that’s the first one. So I’m going to loosen that block out, and then once again, I’m going to line up this part number on both of them, and this is the way that it came off and it’s the way that I keep putting it back on.
Now some people say it doesn’t matter and that’s as tight that you need to go.
And then the last thing that goes on. Now, there is a torque spec on this, but it’s pretty much hand tight. It’s 20, pops back on, it’s pretty clean. That’s fine! so next time you need to get off it shouldn’t be a problem. If there is a problem getting it off when you are hitting it with a hammer, you’re going to come back here, and you’re going to go on this, not up high, but on the bottom part of it, tap it off like that, and go around with it. If you have problems getting it off.
Okay, I hope this helps you out, remember I do this every two seasons. I recommend the same thing, that you should be doing.
So once again this another edition of onboard. I’m Eddie and I’ll catch you at the next video.
Share this article

Written by : Dennise Marone
Follow us
denissemarone@gmail.com
eddieue@gmail.com
Latest articles

April 2, 2025
April 2, 2025
April 2, 2025

April 2, 2025